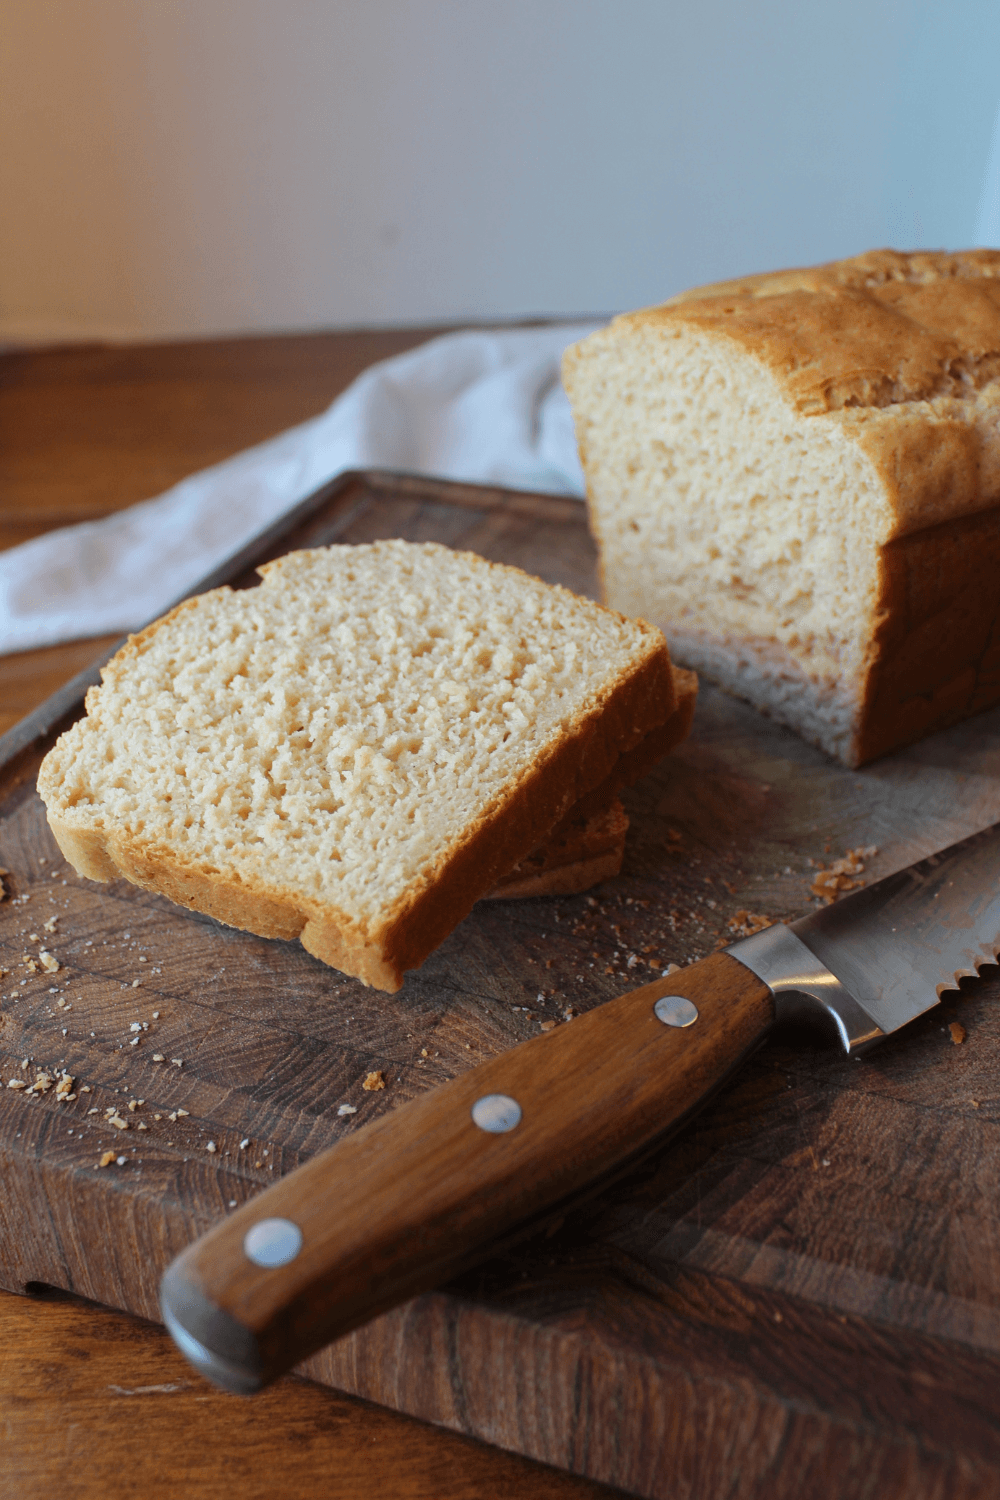
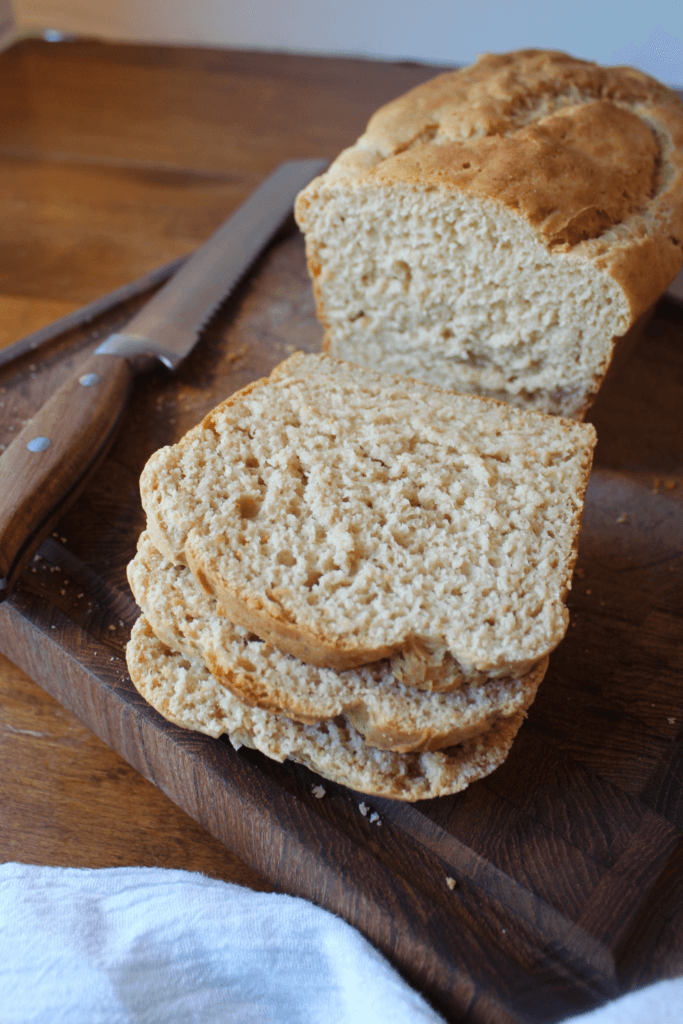
Sandwich Bread

Finding a gluten-free sandwich bread that’s soft, fluffy, and not half the size and double the price of a regular loaf is difficult. But with this simple gluten-free sandwich bread recipe, you can enjoy a homemade loaf that’s perfect for sandwiches, toast, or anything in between. Made with easy-to-find ingredients, this bread is simple to make and effortless which makes this perfect for beginners. This sandwich bread recipe is a game changer for those struggling to enjoy bread again after going gluten free.
Slices of bread on a cutting board with a knife.

Recipe Ingredients & Substitutions

GF Flour: The gluten-free flour in this recipe serves as the breads primary structural component. Though due to the absence of gluten the bread will not have the strength or the elasticity of ordinary bread. The carefully chosen ingredients in this recipe help to mimic a gluten loaf of bread. On the other hand the brand and type flour chosen can drastically change the product. 

My favorite blend, which is used in this recipe is Bob’s Red Mill Gluten Free 1-to-1 Baking Powder. It contains white & brown rice flour, potato starch, sorghum flour, tapioca flour and xanthan gum.

Eggs: Eggs play a crucial role in addressing many of the challenges commonly found in gluten-free baked goods. The eggs help act as a binding agent to provide structure and prevent crumbling after baking. They also help with rising by trading air during mixing, working well in combination with yeast and baking powder. Eggs help keep in some of the moisture preventing dryness and lastly they contribute to the breads golden crust.

Avocado Oil: Often it seems gluten-free baked goods come out dry and crumbly avocado oil adds moisture to make a smoother and softer product. The oil also helps to preserve freshness, with the added fat content the extra moisture slows down the staling process.

Substitutions for avocado oil would be coconut oil or olive oil, but each will contribute to stronger flavors compared to avocado oil.

Honey: First honey does a great job of aiding in yeast activation and improving the doughs rise. Honey also helps with moisture retention and improving texture for a softer crumb. Lastly by adding a touch of natural sweetness, the overall flavor of the bread comes together nicely. 

I would not recommend substituting the type of sugar to a dry or granulated sugar because you would also need to adjust the liquid content of the recipe. If you do not adjust then the final texture and structure of the bread could change drastically. A good alternative substitute would be maple syrup, with a 1:1 ratio with honey.

Salt: In any recipe salt does a great job of enhancing the flavor of the product. Additionally the salt helps t o tighten the bonds of gluten-free binder, like xanthan gum or psyllium husk, to give a better texture. Moreover salt helps to slow down fermentation by slightly inhibiting yeast activity, so your loaf does not over proof. 

I would not recommend completely omitting the salt, if you do you could affect the flavor, texture and proofing of the sandwich bread. If you have to limit salt try decreasing the amount you put in this recipe by half. 

Active Dry Yeast: The yeast in this recipe is crucial to making the sandwich bread, without it the bread would be close to flat. The yeast cannot be omitted although it can be substituted for dry instant yeast at a 1:1 ratio. There are notes in the recipe card below to account for instant yeast which does not require prior activation. 

Baking Powder: Baking powder helps by adding volume to the bread and also by aiding in creating lighter crumb, so that the product doesn’t end up dense. Gluten-free bread lacks structural integrity, so the baking powder works in tandem with the yeast to provide an additional lift during baking.

Baking powder can be substituted for a mixture of baking soda and cream of tartar. For every one part baking soda add two parts cream of tartar.

Psyllium Husk Powder: Psyllium husk powder is often used in combination with other binding agents to mimic the properties of gluten. The psyllium helps provide structure, improve moisture retention, with rise and volume and enhances shelf life. Try to find psyllium husk powder with a lighter color, some are darker and can make your bread loaf grey-ish or purple.

Though this recipe still works without the psyllium husk powder I would highly recommend trying it out, it is a game changer in gluten-free baked goods. Plus it is very affordable and lasts a long time.

Gluten free bread sliced on a wood cutting board with a knife to the side.

Recipe Notes & Tips

Importance of Parchment Paper

Using parchment paper when baking offers numerous benefits, making the process smoother and the results more reliable. Lining your loaf pan with parchment paper not only simplifies cleanup but also makes it easier to lift and handle the loaf after baking. This results in more even baking of the loaf by preventing direct contact with the baking surface.

Using the right parchment paper ensures it can withstand high temperatures safely without releasing harmful substances into your baked goods. When purchasing a parchment paper make sure that it is unbleached and made with silicone and not quilon. Look for the packaging saying FSC (Forest Stewardship Council) and TCF (Totally Chlorine-Free). Quilon is made of heavy metals and can be toxic at higher heats.

Bleached paper is treated with chlorine and can leave behind trace toxins, the paper being white instead of brown is a dead giveaway it has been bleached. Another good practice is staying away from papers that are vague about maximum baking temperatures, about their coating or production process. My favorite parchment paper is from the brand If You Care.

Proofing the Loaf and the Yeast

Proofing yeast can be a difficult and frustrating process, so if you need some help or tips click here. If you still can’t quite get it there are also instructions on the notes of the recipe card below to substitute this recipe for instant yeast and for the most part I can not tell a difference in the final product of the loaves.

When proofing the dough you want to pick a warm draft free spot, this is because with this you are creating an optimal environment for yeast activity. In a cooler environment a crust may form on the dough hindering expansion, also if its too cold yeast activity will decrease. Knowing this being in a warmer environment helps to make the proofing process faster. Though with some bread recipes the oven bread proofing feature is helpful I find it is too warm for this recipe. My favorite place to put it is in the microwave, just make sure not to turn it on when it is in there.

Why Cover the Bread Loaf?

Cover the crust halfway holds many advantages when baking a sandwich loaf. In all covering the pan helps the bread finalize shape, texture and color by preventing over browning or burning of the crust, by trapping in the moisture to keep from a dry loaf and ensures even baking.

Though you may ask, why not cover it the whole time then? Covering the bread too early can trap excess moisture, resulting in a weak, crumbly loaf with a soft, uncrisp crust. Not to mention your bread will not have that golden crust that adds both texture and flavor, making it visually appealing and deliciously crunchy. If you don not want to use tin foil to cover your bread, I also like using one of my cast iron lids or another bread pan upside down on top of the loaf. Just make sure to heat it up with the loaf, so that it is the same temperature when place ontop of the bread. 

Storage

I have found the best way to store this bread is in the freezer, the loaf can be stored in the freezer for up to 3 months. At room temperature the bread will probably be starting to stale by morning and in the fridge it will be stale within a few days. I dont know about you but I cannot eat a loaf of bread that fast. After baking the sandwich bread I let it cool completely, slice it, then I place it into a freezer bag.

I would recommend placing a piece of parchment paper between each slice, then you do not have to wait for the whole loaf to thaw before taking a slice. Though the bread tastes completely fine just thawed, I would also recommend toasting the bread first or at least warming it up. 

Health Benefits of this Recipe

This gluten-free bread loaf recipe contains several key ingredients that provide important vitamins and minerals for overall health. Psyllium husk is an excellent source of dietary fiber, which supports digestive health by promoting regular bowel movements and aiding in gut health. Avocado oil is rich in heart-healthy monounsaturated fats, particularly oleic acid, which can help reduce inflammation and improve cholesterol levels. It also provides vitamin E, an antioxidant that supports skin health and protects against oxidative stress. Eggs are a great source of high-quality protein, essential amino acids, and vitamin B12, which is crucial for red blood cell production and nerve function. Honey adds a natural touch of sweetness and contains small amounts of vitamin C and various antioxidants, supporting immune function. The yeast in the recipe provides a small but valuable amount of B vitamins, particularly B1 (thiamine), which helps convert food into energy. Additionally, gluten-free flour blends typically contain fortified grains that may include iron, vital for oxygen transport in the blood, and folate, important for cell growth and metabolism. Together, these ingredients contribute to a nutrient-dense bread that supports digestive health, energy production, and overall well-being. Learn More

Gluten free bread dry ingredients in mixing bowl.
Yeast rising in a jar with water and honey.
Gluten free bread wet and dry ingredients mixed together in a bowl.
Gluten free bread batter poured into a cast iron bread pan.
Bread has risen after proofing in a bread pan with parchment paper.
Bread loaf in a cast iron pan with a golden top.
Bread loaf out of oven with a piece of tin foil tented over the top.

Explore some of my favorite recommended products to support your health journey (displayed on this page as affiliate links), and remember to always consult a healthcare professional before making any changes to your diet or lifestyle—full medical disclaimer here.

Slices of bread on a cutting board with a knife.

Sandwich Bread

seattlerootstexasboots.com
Prep Time 15 minutes
Cook Time 40 minutes
Rise Time 30 minutes
Total Time 1 hour 25 minutes
Course Side Dish
Cuisine American
Servings 1 loaf
Calories 180 kcal

Ingredients
  

  • 3 cups of gluten-free flour
  • 2 tbsp psyllium husk powder
  • 2 tsp baking powder
  • 1 tsp salt
  • 1 packet active yeast (2 1/4 tsp) or instant yeast (*see note)
  • 1 1/2 cup water at about 110°F
  • 2 eggs room temperature
  • 1/4 cup honey
  • 1/4 cup avocado oil

DIRECTIONS
 

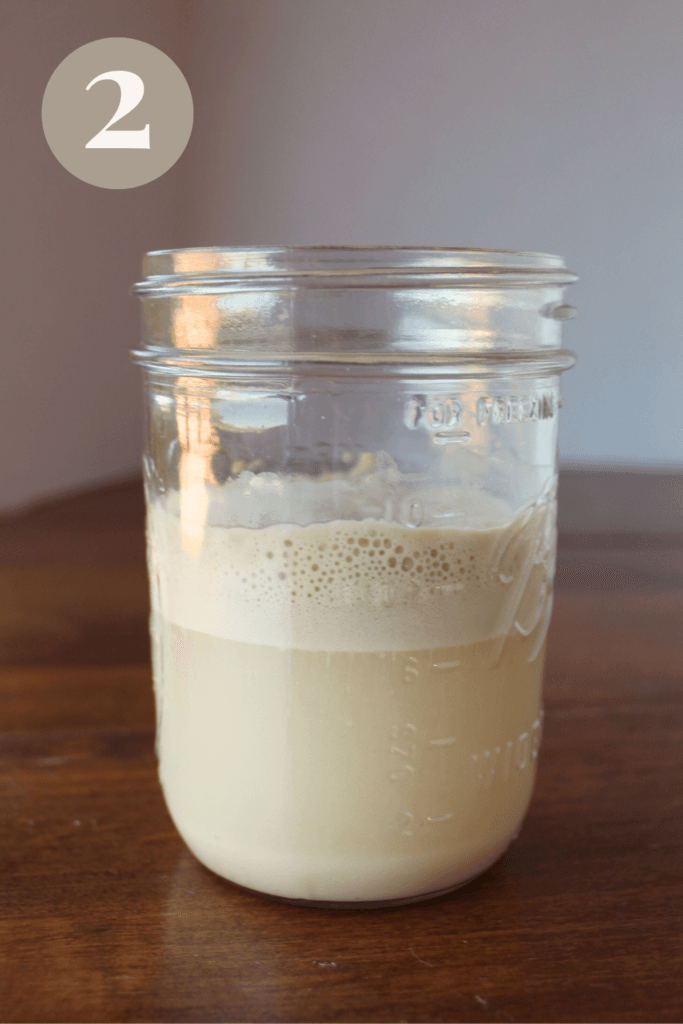
  • Heat 1 cup of water to about 110°F (I heat mine by placing in the microwave for 30 seconds). Mix in 3 drops of honey and active yeast and let sit for 10 minutes. Tips for yeast proofing
    1 packet active yeast (2 1/4 tsp)
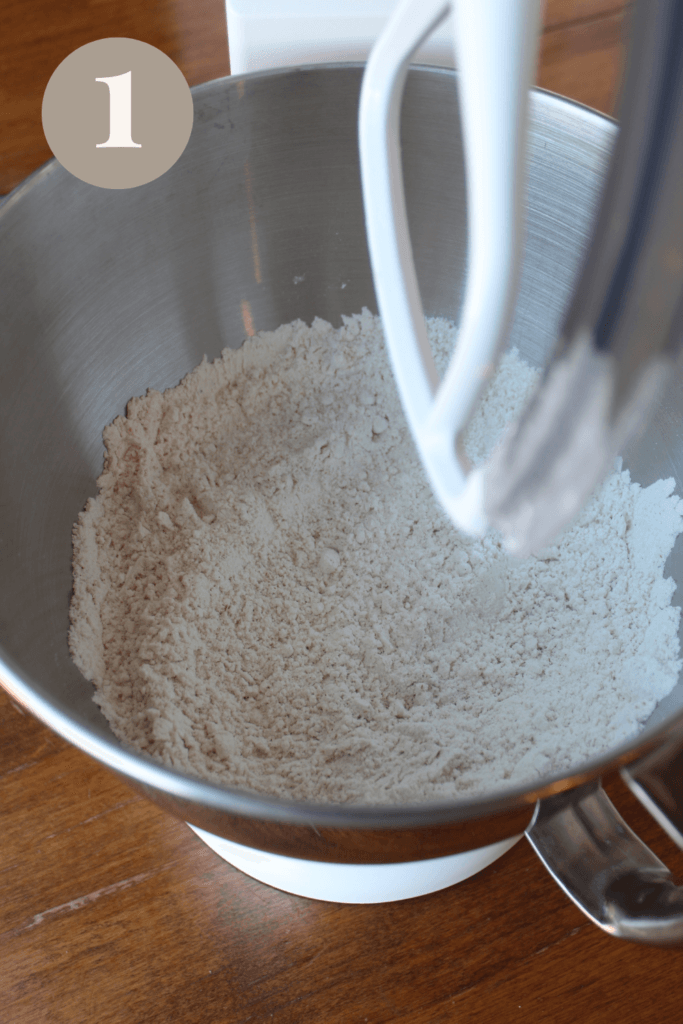
  • While waiting on the yeast, with a standing mixer using a paddle attachment, mix together gluten-free flour, psyllium husk powder, baking powder and salt on low till combined.
    3 cups of gluten-free flour,2 tbsp psyllium husk powder,2 tsp baking powder,1 tsp salt
  • To the mixer, add activated yeast mixture, the rest of the warm water, eggs, honey, & avocado oil. Mix on low speed, for about 1 minute, until the dough comes together.
    2 eggs,1/4 cup honey,1/4 cup avocado oil
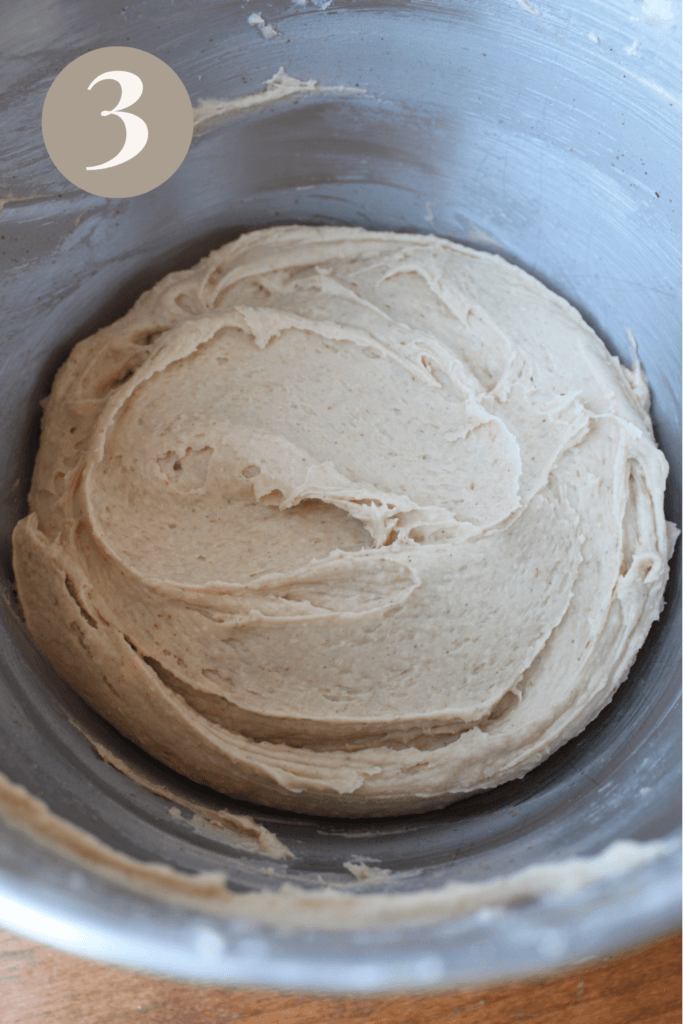
  • Increase mixer speed to medium for 5 minutes, make sure to scrape the bowl down half way through. When you are done you want the batter to be stiff but still sticky.
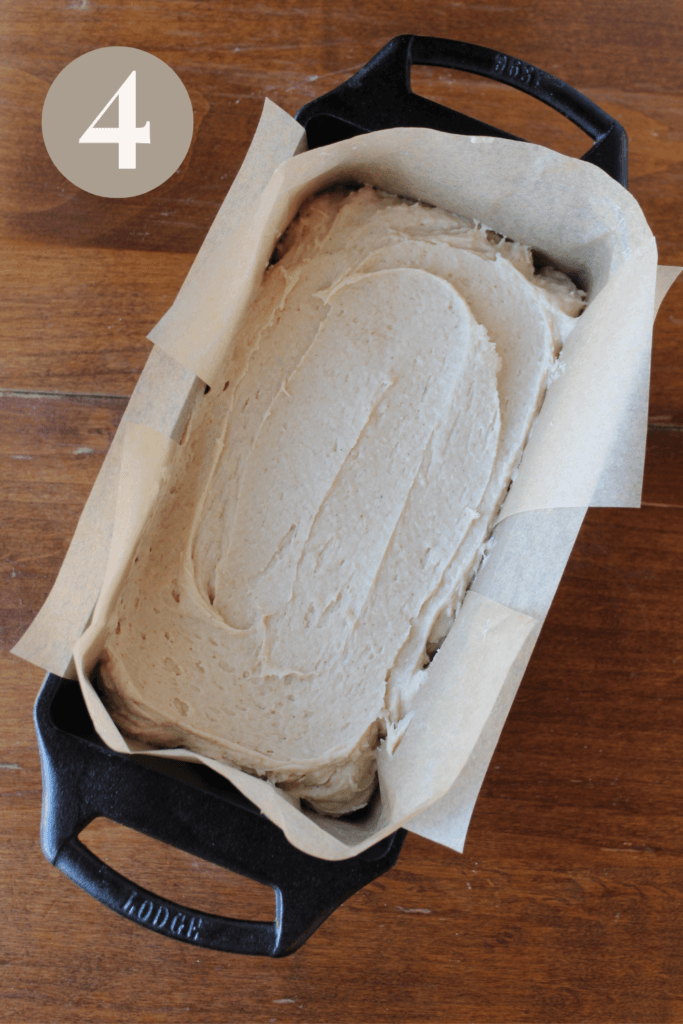
  • Line a loaf pan (***see note) with parchment paper and spray or rub with avocado oil. Then pour the dough into the lined pan, when finished smooth over the top of the dough.
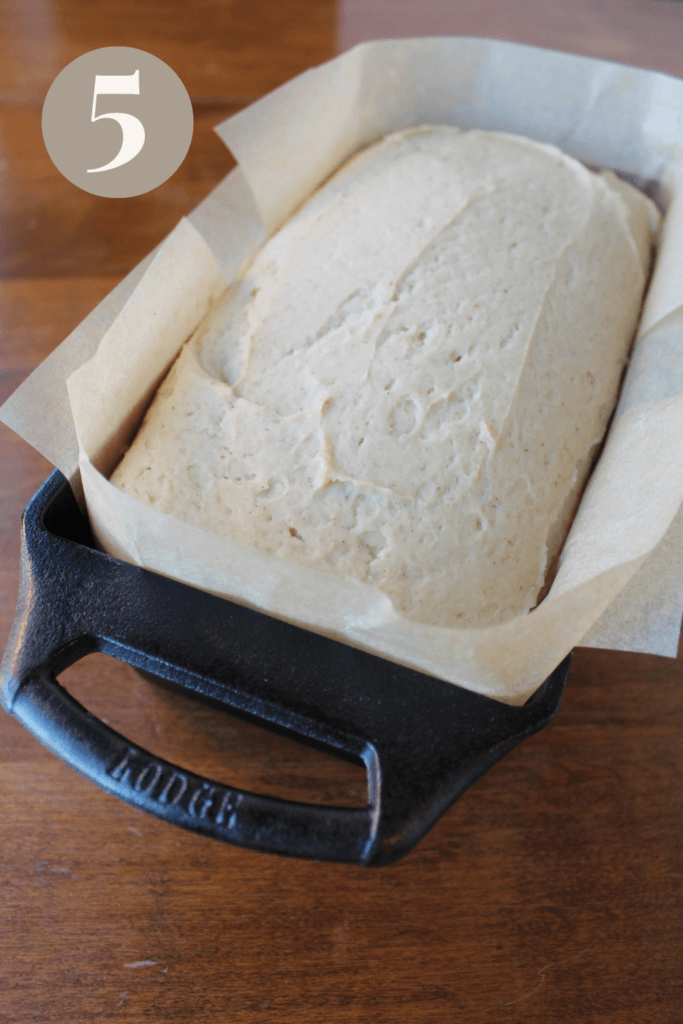
  • Preheat oven to 350°F, then set the dough in a draft free warm spot for about 30 minutes, or until the dough fills to two-thirds of the pan (I like to place the dough in the microwave after using it for heating the water, because its still a little warm).
    *Do not turn on the microwave when the pan is inside.
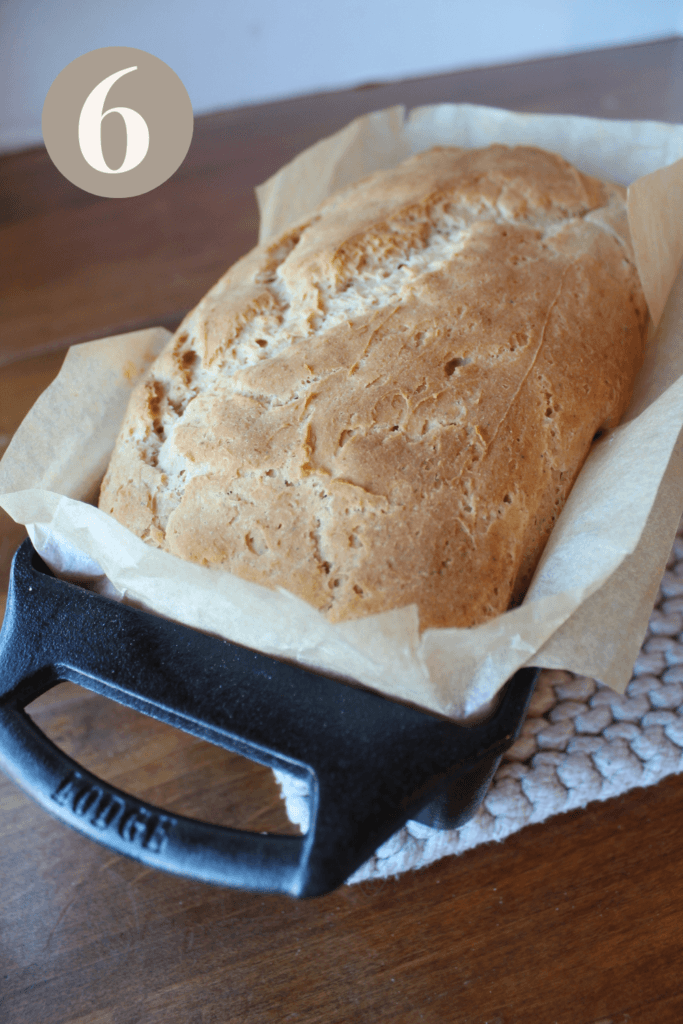
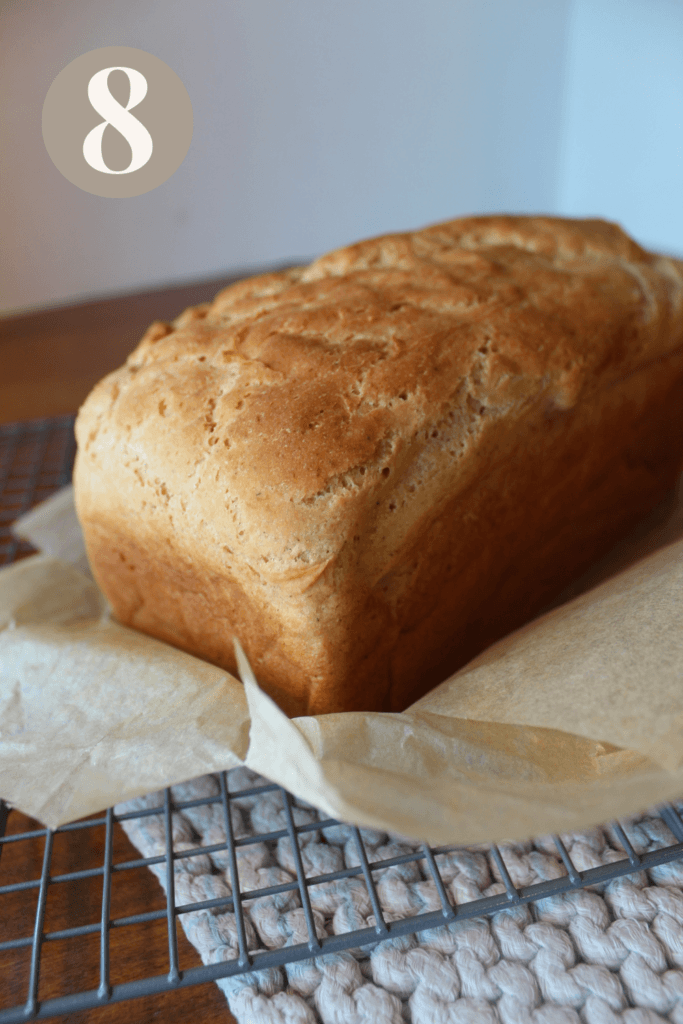
  • Once the bread is done proofing, place the pan in the oven on the middle rack and bake for 45-50 minutes. Halfway through baking tent a piece of foil over the bread (**see note).
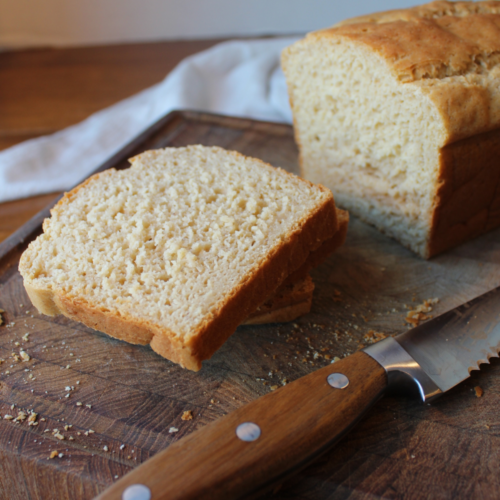
  • When done the bread should have an internal temperature of 190°F, be slightly golden in color, and sound hollow when tapped on the bottom of the loaf. Remove the loaf from the oven and let cool for 5 minutes before removing from the pan with parchment paper. Allow the bread to sit for 2 hours before slicing.
  • Best way to store bread is in freezer with a piece of parchment paper between each slice. I would recommend to toast each slice before eating. Enjoy!

Notes

*Do not proof instant yeast like the active yeast in this recipe. When adding in dry ingredients to the mixing bowl add in dry instant yeast as well. When adding water in with wet ingredients adjust whole amount to 1 1/2 cup.
**See step 7 picture above for help on tenting foil over the pan. You can also use an oven safe lid, I like to use a cast iron, but make sure to heat the lid with the bread so it is already heated when placing it over the loaf pan.
***I would recommend using cast iron or stainless steal for this recipe. Both are best for a crusted bread and both are also non-toxic.
If the bread loaf did not rise properly I would recommend checking the quality and expiration dates on your baking powder and yeast.
This recipe is not specifically meant for celiac individuals. Instead this is meant for gluten sensitive individuals. Celiac individuals need to take extra precautions. This recipe is not meant for vegan individuals, instead for dairy sensitive individuals.

Nutrition

Serving: 1slice | Calories: 180kcal | Carbohydrates: 29.51g | Protein: 4.54g | Fat: 5.8g | Saturated Fat: 1.09g | Trans Fat: 0g | Cholesterol: 27.28mg | Sodium: 200mg | Potassium: 253.59mg | Fiber: 4.38g | Sugar: 6.83g | Vitamin A: 12.9IU | Vitamin C: 0.04mg | Calcium: 22.87mg | Iron: 1.2mg

Nutritional information listed is just an estimate.

Tried this recipe?Please leave a comment below, share a post and mention @seattlerootstexasboots or tag #seattlerootstexasboots.

JOIN THE FAMILY

To keep you updated with all the latest recipes & tips

We don’t spam! Read our privacy policy for more info.

JOIN THE FAMILY

We don’t spam! Read our privacy policy for more info.

Leave a Reply to Prostokva__wvka Cancel Reply

Your email address will not be published. Required fields are marked *

Recipe Rating


2 thoughts on “Sandwich Bread”